
How to Unclog & Align Gutters: Prevent Foundation Damage 2026
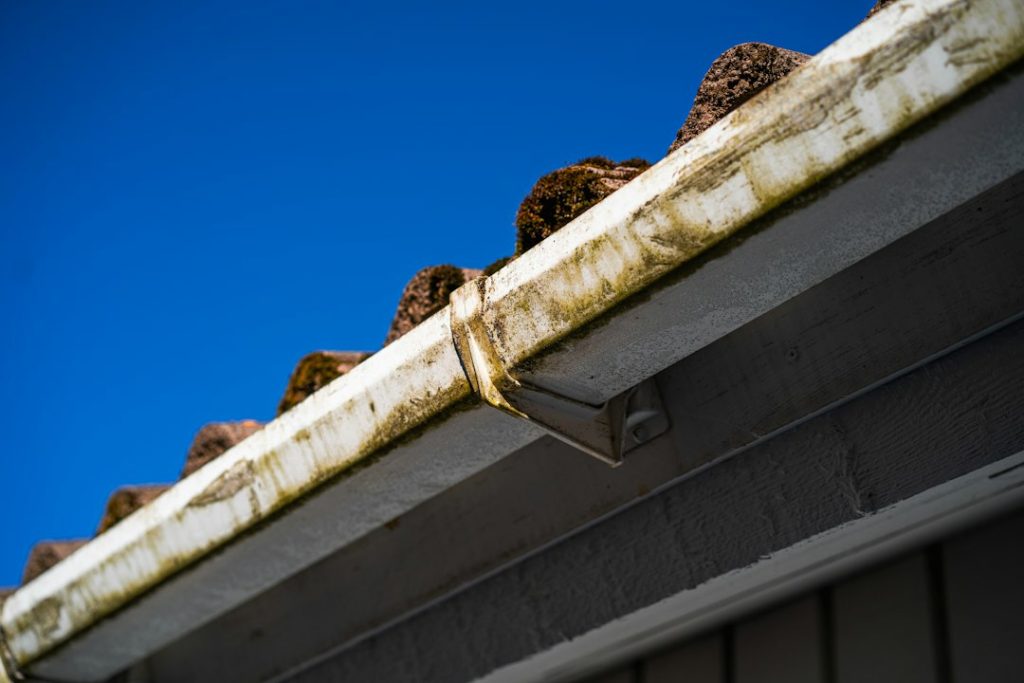
🧰 Tools & Gear You’ll Need
- Ladder (sturdy and appropriate height)
- Work gloves (heavy-duty, waterproof)
- Safety glasses or goggles
- Garden trowel or small shovel
- Gutter scoop or specialized gutter cleaning tool
- Hose with a spray nozzle (or pressure washer with caution)
- Bucket for debris
- Stiff brush
- Plumber’s snake or drain auger (for downspouts)
- Caulking gun and exterior-grade sealant
- Measuring tape
- Level
- Screwdriver or drill with appropriate bits
- Replacement gutter hangers or brackets (if needed)
- Pliers
- Putty knife
- Wire coat hanger (unbent)
- Optional: Leaf blower (with caution and appropriate nozzle)
- Optional: Gutter tongs or grabbers
Why Clogged Gutters Lead to Foundation Damage: A Critical Look
The silent enemy of your home’s foundation isn’t always seismic activity or soil erosion; often, it’s the water your own house is designed to channel away. When exterior gutters become clogged with leaves, twigs, and sediment, they cease to function as intended. Instead of directing rainwater safely away from your home’s structure, they become stagnant reservoirs, causing a cascade of problems that can, and often do, lead to devastating foundation damage. This isn’t just about aesthetics or minor water stains; it’s about protecting the very bedrock of your property. Ignoring clogged gutters is like ignoring a leaky roof – the initial problem seems minor, but the long-term consequences can be catastrophic and astronomically expensive to repair.
The Science Behind Water Diversion and Structural Integrity
Your home’s foundation is designed to bear the load of the structure above, but it’s critically sensitive to water saturation and freeze-thaw cycles. Gutters and downspouts are engineered to create a controlled drainage system, diverting rainwater from the roof edge, far from the foundation walls. When gutters are clogged, water backs up. This standing water can then:
* Soak into the soil: Saturated soil around your foundation loses its load-bearing capacity. It can become soft and unstable, leading to “soil heave” or settling.
* Cause hydrostatic pressure: Water exerts pressure. As it accumulates against your foundation walls, it can create significant hydrostatic pressure, forcing water through even minor cracks and potentially causing structural damage over time.
* Freeze and expand: In colder climates, water trapped in and around the foundation freezes. Water expands when it freezes, exerting immense force that can crack concrete and masonry. This freeze-thaw cycle is particularly insidious, weakening the foundation incrementally with each passing winter.
* Create ice dams: Clogged gutters can lead to ice dams forming at the roof edge. Meltwater then pools behind the ice dam and can seep under shingles, into the attic, and down wall cavities, causing water damage and mold growth, which indirectly stresses the structure.

The entire system relies on gravity and a slight downward pitch. When this system fails due to blockages, water finds its own path – often directly down the exterior walls and into the soil at the base of your foundation.
Common Signs of Gutter Neglect and Early Foundation Warning Signs
Recognizing the symptoms of clogged gutters and potential foundation issues early can save you a fortune. Don’t wait for visible cracks; look for these indicators:
Gutter Neglect Signs:
* Overflowing gutters: Water spilling over the sides, especially during rain, is the most obvious sign.
* Visible debris: Leaves, twigs, or sediment clearly visible in the gutters.
* Sagging gutters: Sections of the gutter pulling away from the fascia board due to the weight of water and debris.
* Mud streaks: Stains running down the exterior walls from overflowing gutters.
* Water pooling: Puddles forming near the foundation after rain.
* Erosion around the foundation: Soil washing away from the base of the house.
Early Foundation Warning Signs:
* Cracks in interior or exterior walls: Especially horizontal or stair-step cracks in masonry.
* Doors or windows that stick or won’t close properly: A sign the house frame is shifting.
* Bowing basement walls: Walls that appear to be pushing inward.
* Gaps around window or door frames: Indicating shifting or settling.
* Water stains or dampness in the basement or crawl space: Often a precursor to more severe saturation issues.
Essential Tools and Safety Gear for Gutter Maintenance
Tackling gutter maintenance requires the right equipment and, more importantly, a robust safety protocol. Working at heights is inherently dangerous, and the materials involved (wet leaves, mud, potentially sharp debris) add to the risk.
Must-Have Tools for Unclogging and Alignment
Beyond basic safety gear, a well-equipped DIYer will find these tools invaluable:
* Ladder: A stable, extension ladder is essential. Ensure it extends high enough to comfortably reach the gutters without overextending. Always maintain three points of contact.
* Gutter Scoop/Trowel: Designed to fit the curve of the gutter, these tools make it easier to scoop out debris. A sturdy garden trowel can substitute in a pinch, but a dedicated tool is more efficient.
* Hose with Spray Nozzle: Crucial for flushing out remaining sediment and testing for clogs in downspouts. A pressure washer can be effective but use a low-pressure setting and wide fan tip to avoid damaging gutters.
* Plumber’s Snake/Drain Auger: The go-to tool for clearing blockages deep within downspouts. A stiff wire coat hanger can sometimes work for minor obstructions near the top.
* Bucket: For collecting the muck you scoop out. Attaching a bucket hanger to your ladder keeps your hands free.
* Stiff Brush: For scrubbing away stubborn residue.
* Putty Knife/Screwdriver: Useful for scraping caked-on muck or gently prying loose sections.
Safety First: Protecting Yourself While Working at Heights
This cannot be stressed enough: safety is paramount.
* Ladder Safety: Position the ladder on firm, level ground. Extend it at a 75-degree angle (the 4:1 rule – for every four feet of height, the base should be one foot away from the wall). Never lean too far to the side; reposition the ladder instead. Have someone stabilize the base if possible.
* Footwear: Wear sturdy, non-slip shoes.
* Gloves: Waterproof, heavy-duty gloves protect your hands from sharp debris, insects, and generally nasty muck.
* Eye Protection: Safety glasses or goggles are non-negotiable to prevent debris from entering your eyes.
* Clothing: Wear long sleeves and pants to protect your skin. Avoid loose clothing that could snag.
* Weather: Never work on gutters during rain, high winds, or if the ground is slippery.
* Electrical Hazards: Be acutely aware of overhead power lines. Maintain a safe distance. If power lines run near your gutters, consider hiring a professional.
Step-by-Step Guide: How to Unclog Your Exterior Gutters
Once you’ve gathered your tools and prioritized safety, it’s time to get to work. The process involves clearing the main channels and then addressing the downspouts.
Clearing Downspouts: The First Line of Defense
Downspouts are frequent clog culprits, often getting blocked by smaller debris that makes its way down from the main gutters.
Clear Gutter Outlets
Start by removing any visible debris directly around the entrance of each downspout in the main gutter channel. Use your trowel or scoop to pull this muck away.
Flush with Water
Using your hose, spray water directly into the downspout opening. If water flows freely, you’re likely in the clear for this downspout. If it backs up or trickles out slowly, you have a clog deeper inside.
Use a Plumber’s Snake or Auger
Feed the plumber’s snake or drain auger into the downspout from the top opening. Rotate the handle as you push it down. You’ll feel resistance when you hit the clog. Work the snake back and forth to break it up and dislodge it. Once you feel the obstruction has cleared, flush with water again.
Clear from the Bottom (If Necessary)
If you can’t clear it from the top, or if the clog is near the bottom elbow, you may need to disconnect the downspout at its base (usually held by screws or clips). Once detached, you can try to dislodge the clog manually, use the snake from below, or use a strong jet of water.
Reassemble and Test
If you disconnected the downspout, reassemble it securely. Flush with water again to ensure a clear path from gutter to ground.

Tackling Stubborn Debris in the Main Gutter Channels
With downspouts clear, focus on the horizontal gutter runs.
Scoop Out Loose Debris
Working in manageable sections, use your gutter scoop or trowel to remove leaves, twigs, and mud. Place the debris into your bucket. Avoid simply pushing it towards the downspout opening, as this can worsen clogs.
Scrape Away Caked-On Muck
Once the bulk of the debris is removed, use a putty knife or stiff brush to scrape away any compacted sludge or algae buildup clinging to the bottom and sides of the gutter.
Use a Wire or Coat Hanger for Small Nooks
For hard-to-reach spots, like under hangers or tight corners, an unbent wire coat hanger can be used to dislodge packed debris. Be gentle to avoid puncturing the gutter material.
Using Water to Flush and Verify Clear Flow
This is the final check and cleaning step.
Flush the Entire Gutter System
Starting at the end furthest from the downspout, use your hose with a strong spray to flush the entire length of the gutter. Work your way towards the downspout, washing accumulated grime and any remaining small debris into it.
Observe Water Flow
Watch carefully as the water flows through the gutters and down the downspouts. Ensure there are no new blockages and that water is moving freely and directed away from the house. Check the downspout exits to confirm strong, clear flow.
Spot Check for Leaks
While flushing, inspect the gutter seams and connections for any leaks. Minor drips can often be sealed with exterior-grade sealant. We’ll cover leak repair in more detail later.

Aligning Your Gutters for Optimal Water Flow
Clear gutters are only half the battle. If they aren’t properly aligned and sloped, they won’t function effectively, leading to pooling water and potential damage.
Checking for Sagging and Proper Pitch
Gutters need a slight downward slope towards the downspout – typically about 1/4 inch per 10 feet of run.
Visual Inspection
Look for any sections that appear to be sagging between hangers. Also, visually check if the gutter seems level or is sloping in the wrong direction.
Use a Level
Place a long level (at least 3-4 feet) inside the gutter. Start at the end furthest from the downspout and work your way towards it. The level should show a slight downward slope. Measure the drop over a set distance (e.g., 10 feet) to confirm the pitch is adequate.
Check Downspout Outlet
Ensure the downspout opening is the lowest point in that section of the gutter run.
Adjusting Hangers and Brackets for Correct Slope
If your gutters sag or have the wrong pitch, you’ll need to adjust the supports.
Identify Sagging Points
Note where the gutter is lowest or pulling away from the fascia.
Adjust Existing Hangers
Many gutter hangers are adjustable. You might be able to loosen screws, gently bend the hanger, and re-tighten. Sometimes, you can add shims (small pieces of wood or plastic) behind the hanger bracket where it attaches to the fascia to lift that section of the gutter.
Add or Replace Hangers
If the span between hangers is too great (more than 3-4 feet, depending on gutter material and style), or if hangers are damaged, you’ll need to add new ones or replace existing ones. Ensure new hangers are positioned to provide the correct slope. Typically, hangers are installed every 3 to 4 feet, and at seams and end caps.
Secure Brackets Firmly
Ensure all screws attaching brackets to the fascia are tight and secure. Use corrosion-resistant screws (stainless steel or galvanized).
Securing Loose Sections and Joints
Leaky seams and loose end caps are common issues that exacerbate water damage problems.
Inspect All Seams and End Caps
Check where sections of gutter join and where end caps meet the main channel.
Clean the Area
Thoroughly clean the area around the seam or end cap where you plan to apply sealant. Remove any dirt, old sealant, or rust.
Apply Exterior Sealant
Use a high-quality exterior-grade caulk or sealant (often labeled for gutters or roofing). Apply a generous, continuous bead along the inside seam or around the edge of the end cap. Ensure it fills any gaps completely.
Smooth and Secure
Use a putty knife or a wet finger to smooth the sealant, ensuring a watertight seal. If the section is particularly loose, you might need to temporarily clamp it or use gutter sealant rivets/screws designed for this purpose before the sealant cures.
Allow Curing Time
Follow the sealant manufacturer’s instructions for curing time before exposing the area to significant water flow.

Advanced Gutter Maintenance and Prevention Strategies
Once your gutters are clean and aligned, consider strategies to make maintenance easier and prevent future issues.
Gutter Guards: Do They Actually Work?
Gutter guards, screens, or covers are sold as a way to keep debris out. Their effectiveness varies wildly.
* Mesh or Screen Guards: These cover the gutter opening but allow water through. They can be effective against larger debris like leaves but smaller materials (pine needles, shingle grit) can still get through or clog the mesh itself, requiring cleaning. Some fine-mesh guards can actually impede water flow in heavy rain if they clog.
* Solid Covers (Reverse Curve): These often feature an opening that water flows into, while debris slides off the smooth surface. They can be highly effective but are more expensive and require professional installation. They also require periodic cleaning of the surface and the small channel beneath.
* Brush or Spiky Guards: These are inserted into the gutter and physically block debris. They can work but can also trap moisture and create their own cleaning challenges.
When to Consider Professional Gutter Cleaning or Repair
DIY gutter maintenance is feasible for many homeowners, but there are clear times when calling a professional is the smarter, safer, and more effective choice:
* Height and Accessibility: If your gutters are excessively high, difficult to access, or located near power lines.
* Physical Limitations: If you have mobility issues, balance problems, or are uncomfortable working at heights.
* Severe Clogs or Damage: If downspouts are completely blocked and cannot be cleared, or if gutters are significantly damaged (e.g., large holes, structural compromise).
* Frequent Issues: If you find yourself constantly cleaning your gutters, it might indicate a larger problem with the system’s design, slope, or watershed.
* Foundation Concerns: If you already suspect foundation damage, a professional assessment of your entire drainage system (gutters, downspouts, grading) is crucial.
Seasonal Gutter Maintenance Schedule for 2026
A proactive schedule prevents major problems.
* Spring (Late March – April): Thorough cleaning after winter storms and ice melt. Check for winter damage.
* Fall (Late October – November): Essential cleaning after leaves have fallen. This prevents winter ice dams and spring clogs.
* Mid-Summer (Optional): A quick visual inspection and light cleaning if you live in an area with heavy summer rains or frequent tree debris.
* As Needed: After severe storms that might dislodge debris or cause damage.
Troubleshooting Common Gutter Problems Beyond Clogs
While clogs are the most frequent issue, other problems can plague your gutter system.
Identifying and Repairing Leaks
Leaks typically occur at seams, end caps, or due to corrosion or physical damage (holes, cracks).
* Locate the Leak: Perform a water test (as described earlier) on a clear day to pinpoint the exact source.
* Clean and Dry: Thoroughly clean and dry the area around the leak.
* Seal: For small holes or seam leaks, use a high-quality exterior-grade gutter sealant. For larger holes, you may need a patch kit or to replace the damaged section. Ensure compatibility with your gutter material (aluminum, vinyl, steel, copper).
Dealing with Overflow During Heavy Rain
If your gutters overflow even when clean, it could be due to:
* Insufficient Gutter Size: Your gutters might be too small for the roof area they service, especially in regions with heavy rainfall.
* Inadequate Downspouts: Not enough downspouts, or downspouts that are too narrow, can’t handle the volume of water.
* Improper Slope: Water is not being directed efficiently to the downspouts.
* Clogged Downspout Elbows: Sometimes a partial clog in an elbow can restrict flow.
Addressing these might require installing additional downspouts, upgrading to larger gutters, or correcting the slope.
FAQ: Your Top Questions About Gutter Maintenance Answered
How Often Should Gutters Be Cleaned?
For most homes, cleaning gutters twice a year – once in late spring and again in late fall – is sufficient. Homes surrounded by numerous trees, especially deciduous ones, may require more frequent cleanings, potentially 3-4 times a year.
Can I Do Gutter Alignment Myself?
Yes, if you are comfortable working at heights and have the necessary tools and understanding of the required slope (approx. 1/4 inch per 10 feet). Adjusting hangers and brackets is a manageable DIY task for many. However, if the structure itself is compromised or the pitch is severely off, professional help might be needed.
What If My Foundation Damage Is Already Visible?
If you see visible cracks, bowing walls, or significant settling, *do not delay*. Contact a qualified foundation repair specialist immediately. While you should still address your gutter system to prevent further damage, professional assessment and repair of existing foundation issues are critical and cannot be addressed by gutter maintenance alone.