
How to Fix Leaky Garbage Disposal: Bottom & Side Leaks (2026)
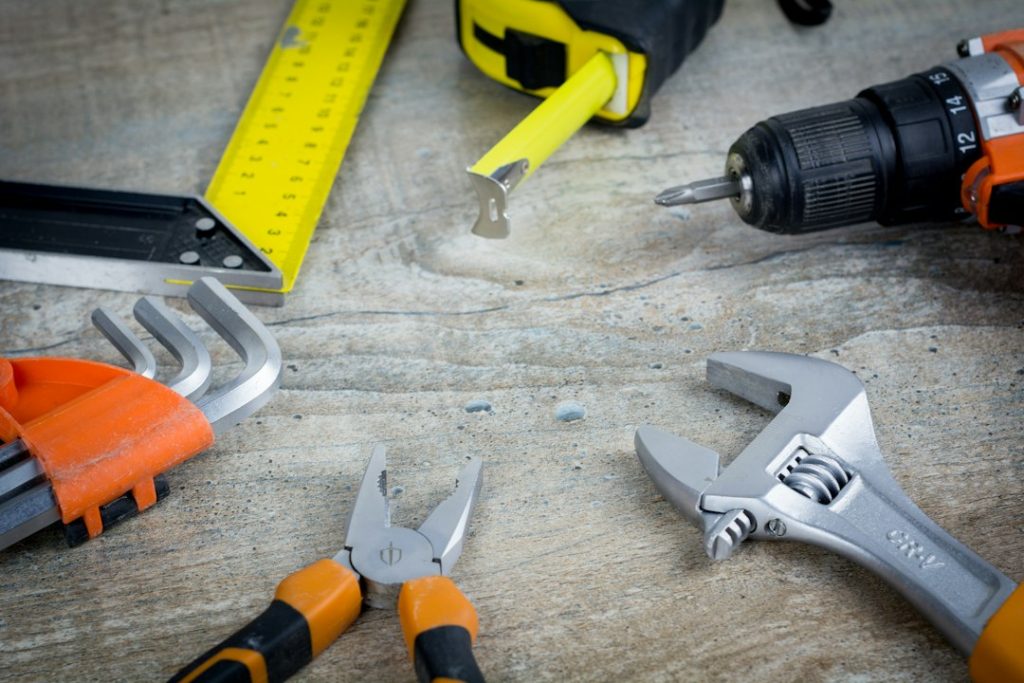
🧰 Tools & Gear You’ll Need
- Bucket or large container
- Old towels or rags
- Screwdriver set (Phillips and flathead)
- Adjustable wrench
- Pliers
- Plumber’s putty
- Replacement parts (gasket, O-ring, hoses, as needed)
- Safety goggles
- Work gloves
- Flashlight
- Optional: Putty knife
Diagnosing the Leak: Bottom vs. Side Drips
A leaking garbage disposal is more than just an annoyance; it’s a potential water damage disaster waiting to happen. Before you grab your tools, you need to pinpoint where the water is coming from. Is it dripping from the very bottom of the unit, or is it seeping from the sides? This distinction is crucial because it dictates the likely cause and the repair approach.
Identifying the Leak Source: A Step-by-Step Visual Guide
Safely Shut Off Power
Before any inspection or work, always disconnect the power to the garbage disposal. This usually means flipping the circuit breaker dedicated to the disposal. Don’t rely on just the wall switch; it might be wired incorrectly. For absolute certainty, unplug it if it has a plug, or if directly wired, confirm the breaker is off. This is non-negotiable for safety.
Dry the Area Thoroughly
Use old towels to completely dry the exterior of the garbage disposal unit, the pipes, and the surrounding cabinet floor. A dry surface will make it much easier to spot fresh water seeping out.
Simulate Usage (Carefully!)
With power still off, place a bucket or large container directly underneath the disposal unit. Slowly run a small amount of cold water into the sink for a minute or two. Don’t turn the disposal on yet. Observe closely where the first drips appear.
Turn On Disposal (Briefly & Safely)
If no leaks are apparent with just water, restore power *briefly* and turn on the disposal with a small amount of cold water running. Listen for unusual noises and observe for any leaks. Then, immediately shut off the power and the water. Repeat the drying and inspection process.
Detailed Inspection
Use a flashlight to meticulously inspect all connection points: the sink flange at the top, the dishwasher hose connection (if applicable), the pipe connecting to the drain, and the main body of the unit itself. Look for drips, moisture trails, or mineral deposits which indicate past leaks.
Common Culprits for Bottom Leaks
Leaks originating from the absolute bottom of the unit are often related to internal seals or the main housing. Here are the usual suspects:
- Internal Seal Failure: The seals inside the disposal unit that separate the grinding chamber from the motor can degrade over time, leading to leaks directly from the bottom. This is often the most serious type of leak and may necessitate unit replacement.
- Cracked Housing: While less common, the main body of the disposal unit can develop cracks due to age, corrosion, or impact from hard objects accidentally ground up.
- Loose Mounting Assembly: The mechanism that attaches the disposal to the sink flange might loosen over time. While this can cause leaks higher up, severe loosening can sometimes manifest as drips from the very bottom.
Common Culprits for Side Leaks
Leaks appearing on the sides of the disposal unit usually point to issues with connections or the components attached to the unit:
- Dishwasher Hose Connection: If you have a dishwasher, its drain hose connects to a port on the side of the disposal. A loose clamp, a cracked hose, or a faulty gasket at this connection is a very frequent cause of side leaks.
- Drainpipe Connection: The main drainpipe that carries water away from the disposal connects to a flange on the side or back. A loose connection, deteriorated gasket, or a crack in the pipe itself can cause leaks here.
- Sink Flange Seal: Where the disposal unit mounts to the underside of the sink, there’s a gasket and often plumber’s putty creating a seal. If this seal fails, water can seep out from the top sides of the unit, near where it meets the sink.
- Body Seals (Higher Up): Some disposals have multiple seals or access points on the sides for components. These can wear out or become dislodged.

Essential Tools & Safety Precautions for Garbage Disposal Repair
Tackling a leaky garbage disposal requires more than just a wrench; it demands a safety-first mindset and the right tools. Skipping these basics can turn a simple fix into a dangerous situation or a costly mess.
What You’ll Need: A Comprehensive Tool Checklist
Having the right gear on hand saves time and frustration. Here’s what you should gather before starting:
- Bucket/Container: Essential for catching residual water when disconnecting pipes or removing the unit.
- Old Towels/Rags: You’ll need plenty for drying, cleaning, and catching drips.
- Screwdriver Set: Both Phillips and flathead are typically needed for hose clamps and mounting screws.
- Adjustable Wrench: Crucial for tightening and loosening pipe fittings and mounting hardware.
- Pliers: Useful for gripping, holding, and manipulating hoses and clamps.
- Plumber’s Putty: Often required to create a watertight seal between the sink flange and the sink basin, and sometimes for pipe connections. Ensure it’s fresh and pliable.
- Replacement Parts: Have potential replacement gaskets, O-rings, or even a new hose clamp ready if you suspect a specific part failure. It’s wise to buy these *after* diagnosis if possible, but having common parts can be a lifesaver.
- Flashlight: A dark cabinet under the sink needs illumination. A headlamp is even better, freeing up your hands.
- Putty Knife (Optional): Helpful for scraping away old putty or sealant.
- New Disposal (If Necessary): If diagnosis points to a failed unit, have your replacement ready.
Safety First: Disconnecting Power & Water
This cannot be stressed enough. Working with electricity and water simultaneously is hazardous.
Locate the Circuit Breaker
Find your home’s main electrical panel. Identify the breaker controlling the garbage disposal. It might be labeled “Disposal,” “Kitchen,” or be grouped with other kitchen outlets. If unsure, turn off the main breaker, but this is inconvenient for other household functions.
Flip the Breaker OFF
Firmly switch the breaker to the “OFF” position. To be absolutely certain, you can try flipping the wall switch for the disposal; it should not activate. If the disposal has a power cord and plug under the sink, unplug it as an extra layer of safety.
Turn Off Water Supply (If Necessary)
For most repairs, you don’t need to shut off the main water supply to the house. However, if you’re replacing the entire unit or dealing with pipes directly connected to the water supply (uncommon for disposals), you might need to turn off the hot and cold water valves under the sink, or the main house valve if necessary.
Protective Gear: Don’t Skip the Gloves and Goggles
Your hands and eyes are your most valuable tools. Protect them:
- Safety Goggles: Protect your eyes from falling debris, water splashes, or accidentally dropped tools. Essential when working overhead.
- Work Gloves: Keep your hands from getting cut on sharp metal edges, or from unpleasant residue. Insulated gloves are a good idea if dealing with potentially damp areas.

Fixing Bottom Leaks: Common Issues and Solutions
Bottom leaks are often more serious, pointing towards internal wear or damage. Here’s how to approach them.
The Dishwasher Hose Connection: Tightening & Replacement
While technically a side connection, a severely failed dishwasher hose or clamp can sometimes allow water to cascade down the side and pool at the bottom. Check this first, as it’s often the simplest fix.
Locate the Hose Clamp
Find where the dishwasher drain hose connects to the garbage disposal. There’s usually a metal clamp securing it.
Tighten the Clamp
Using a screwdriver or nut driver, tighten the clamp. Ensure it’s snug, but don’t overtighten to the point of damaging the hose or the disposal’s inlet nipple.
Inspect Hose for Damage
If tightening doesn’t help, examine the hose itself. Look for cracks, splits, or signs of wear. If the hose is damaged, it needs replacement. You may need to disconnect the other end from the dishwasher to slide it off the disposal nipple.
Replace Hose and Secure
Install the new hose, ensuring it’s fully seated on the nipple, and secure it firmly with a new, corrosion-resistant clamp.
Replacing the Mounting Gasket & Rings
The disposal mounts to the sink flange via a series of rings and a gasket. If these are worn or improperly seated, leaks can occur, sometimes manifesting lower down.
Detach the Disposal Unit
This is often the most involved step. You’ll need to loosen or remove the mounting ring that holds the disposal to the sink flange. This usually requires a specific tool (often supplied with a new disposal) or a screwdriver and hammer to turn the ring. Be prepared for the weight of the unit when it detaches. Support it carefully.
Remove Old Gasket and Rings
Once detached, carefully remove the old fiber gasket, backup flange, and mounting ring. Clean the sink opening thoroughly.
Install New Gasket and Components
Refer to your new disposal’s instructions or a universal guide. Typically, you’ll install a new rubber gasket, followed by a fiber or plastic backup flange, and then the mounting ring. Ensure all parts are correctly oriented.
Re-attach the Disposal Unit
Carefully lift the disposal back into place, aligning it with the mounting assembly. Tighten the mounting ring securely. Ensure the unit is stable and doesn’t swivel excessively.
Addressing Leaks from the Main Housing Unit
If the leak is clearly coming from the casing of the disposal itself, below the level of any connections, it usually indicates internal seal failure or a crack in the housing. This is typically unrepairable.
Confirm the Source
Double-check that the leak isn’t originating from a higher connection (like the dishwasher hose or sink flange) and merely running down the side to pool at the bottom.
Inspect for Cracks
Use your flashlight to look for any visible cracks or breaches in the metal or plastic housing of the disposal unit.
Consider Replacement
For leaks originating directly from the main body of the disposal, replacement is almost always the most practical and reliable solution. Repairing these internal components is generally not feasible for homeowners and often beyond the scope of a simple DIY fix.
When to Consider Replacing the Entire Disposal Unit
Age, excessive noise, frequent jams, and persistent leaks (especially from the main housing) are all strong indicators that it’s time for a new unit. Replacing an old, problematic disposal can save you future headaches and potential water damage.

Tackling Side Leaks: From the Sink Flange to the Body
Side leaks are often more manageable than bottom leaks and frequently involve connection points.
Resealing the Sink Flange: A Definitive Guide
The seal between the sink drain opening and the garbage disposal’s mounting flange is critical. If it fails, water drips from the sides, just below the sink.
Disconnect Disposal (As per previous section)
You’ll need to detach the disposal unit from the sink flange to access the seal.
Clean Old Putty/Sealant
Scrape away all residual plumber’s putty or sealant from both the underside of the sink flange and the sink opening using a putty knife. Ensure the surfaces are completely clean and dry.
Apply New Plumber’s Putty
Roll a generous amount of fresh plumber’s putty into a rope, about 1/2 inch thick. Apply this rope evenly around the underside lip of the sink flange where it will contact the sink.
Reassemble and Tighten
Carefully position the flange back into the sink opening. Reinstall the disposal unit, ensuring the mounting assembly (gasket, backup flange, mounting ring) is correctly seated and tightened securely. As you tighten, the putty will squeeze out. Wipe away the excess.
Investigating Leaks from the Drainpipe Connections
The pipe carrying wastewater away from the disposal can leak at its connection point.
Locate the Drainpipe Connection
Identify where the disposal unit’s outlet connects to the main sink drainpipe (often a P-trap assembly).
Check for Loose Fittings
Many disposal discharge pipes use slip-nut connections. Try gently tightening these nuts by hand first, then with pliers or a wrench if needed. Be careful not to overtighten plastic fittings.
Inspect Gaskets and Seals
If tightening doesn’t work, the rubber gasket within the slip-nut fitting may be worn, cracked, or missing. You may need to disconnect the pipe, replace the gasket, and reassemble.
Repairing or Replacing the Disposal Body Seals
Leaks emanating from seams or joints on the disposal’s body (not the very bottom) could be failing internal seals. As mentioned, these are usually not DIY repairable.
Pinpoint the Exact Leak Location
Meticulously dry the unit and observe closely during a simulated water run (power OFF!) to identify the precise point of leakage on the body.
Check External Fasteners
Some models have screws or bolts around the casing. Ensure these are snug, but do not overtighten, as this could deform the housing.
Prepare for Replacement if Necessary
If the leak is confirmed to be from the sealed body of the unit, your best course of action is to plan for a replacement.
The Reset Button Mystery: Does it Stop Leaks?
The small red or black button, usually found on the bottom or side of the disposal, is a thermal overload protector. It trips when the motor overheats (due to a jam or overuse) and shuts off the unit. It does not affect water seals or prevent leaks.
Understand its Function
The reset button is purely for electrical safety, preventing motor burnout. It has no role in water containment.
How to Use It (for Overheating Issues)
If the disposal stops working unexpectedly, wait a few minutes for it to cool, then press the reset button firmly. If it clicks and stays in, power should be restored. If it trips again immediately, there’s likely still a jam or another electrical issue.
Troubleshooting Persistent Garbage Disposal Leaks
Sometimes, even after careful inspection, the source of a leak remains elusive, or a repair doesn’t hold. Here’s how to approach stubborn problems.
The “Is it the Disposal or the Plumbing?” Test
It’s crucial to differentiate between a leak from the disposal itself and a leak from the connected drainpipes or fixture seals (like the sink drain).
Isolate the Disposal
If possible, disconnect the disposal’s drain outlet from the rest of the plumbing. Plug the disposal outlet temporarily (e.g., with a rubber stopper or rag). Run water into the sink and let it drain down the pipes *without* going through the disposal. If the leak appears now, the problem is likely in the sink drain pipes, P-trap, or the sink seal itself, not the disposal.
Isolate the Plumbing
Conversely, if you suspect the disposal but want to rule out the plumbing, seal the sink drain completely (use a stopper or wet rag). Then, run water *only* into the disposal (power off!). If it leaks, the disposal is the likely culprit.

When to Call a Professional Plumber
Don’t hesitate to call in the pros if:
- You cannot confidently identify the source of the leak.
- The leak appears to be from the main housing or internal seals of the disposal.
- You are uncomfortable disconnecting electrical components or heavy plumbing.
- You’ve attempted a repair, and the leak persists or worsens.
- The problem involves complex plumbing beyond simple connections.
- You suspect damage to your sink or cabinetry that requires professional assessment.
Preventive Maintenance Tips to Avoid Future Leaks
Keep your disposal running smoothly and leak-free with these habits:
- Run Cold Water: Always run cold water before, during, and for about 15-30 seconds after using the disposal. This helps flush food particles through and keeps the unit cool.
- Avoid Harsh Chemicals: Never pour bleach, drain cleaners, or other harsh chemicals down the disposal. They can corrode components and seals over time. Use natural cleaners like baking soda and vinegar occasionally.
- Grind Ice Cubes: Periodically grinding a few ice cubes can help scour the inside of the grinding chamber and dislodge buildup.
- Avoid Fibrous/Starchy Foods: Items like celery stalks, corn husks, potato peels, and pasta can wrap around blades or clog the system.
- No Grease or Oil: These substances solidify and coat pipes, leading to clogs and strain on the disposal.
- Check Connections Periodically: Annually, give the hose clamps and pipe fittings a quick visual inspection and gentle tighten if needed.
FAQ: Your Top Garbage Disposal Leak Questions Answered (2026)
Can I Use Plumber’s Putty to Fix a Leak?
Plumber’s putty is primarily used to create a watertight seal for fixtures like sink flanges, drains, and faucets where they meet porcelain or metal. It’s essential for sealing the sink flange to the disposal mount. However, it is not a general-purpose sealant for cracks in the disposal unit’s housing or for pipe joints (which typically use gaskets and friction seals). Using it incorrectly won’t fix internal leaks.
How Often Should a Garbage Disposal Be Replaced?
The average lifespan of a garbage disposal is typically 8-15 years, depending on usage, maintenance, and build quality. If yours is nearing the 10-year mark and starts experiencing issues like leaks, excessive noise, or frequent jams, it’s often more cost-effective in the long run to replace it rather than chase intermittent repairs.
What Does the Reset Button Actually Do?
The reset button is a safety feature called a thermal overload protector. If the disposal’s motor overheats due to a jam, excessive use, or a voltage issue, this button pops out, cutting off power to prevent motor damage. Once the motor cools down and the obstruction (if any) is cleared, pressing the button can restore power. It has no function related to stopping or preventing water leaks.