
Clean & Restore Deck: Best 2026 Guide Before Sealing
🧰 Tools & Gear You’ll Need
- Deck cleaner (oxygen bleach-based is recommended for less harshness)
- Deck stain stripper (if old finish is present and needs removal)
- Wood brightener or conditioner
- Stiff-bristled deck brush or broom
- Garden hose with spray nozzle or a pressure washer (use with caution)
- Buckets
- Gloves (chemical-resistant)
- Eye protection (safety goggles)
- Long-sleeved shirt and pants
- Sanding pole sander or orbital sander (with appropriate grit sandpaper, e.g., 60-80 grit)
- Handheld orbital sander or sanding block
- Scrapers (for stubborn gunk)
- Wood filler or epoxy (for repairs)
- Tarp or plastic sheeting
- Paint brushes, rollers, or deck stain applicators
- High-quality deck sealer
- Leaf blower (optional, for drying)
- Rags
Assessing Your Deck’s Condition: Identifying the Need for Cleaning and Restoration
Before you even think about grabbing a bucket, take a hard, honest look at your deck. Weathered wood tells a story, and understanding it is key to a successful restoration. Ignoring underlying issues will lead to a seal job that fails prematurely, costing you time and money down the line. We’re not just slapping on a coat of paint here; we’re rebuilding a foundation.
Signs of Weathering: Graying, Fraying, and Mold Growth
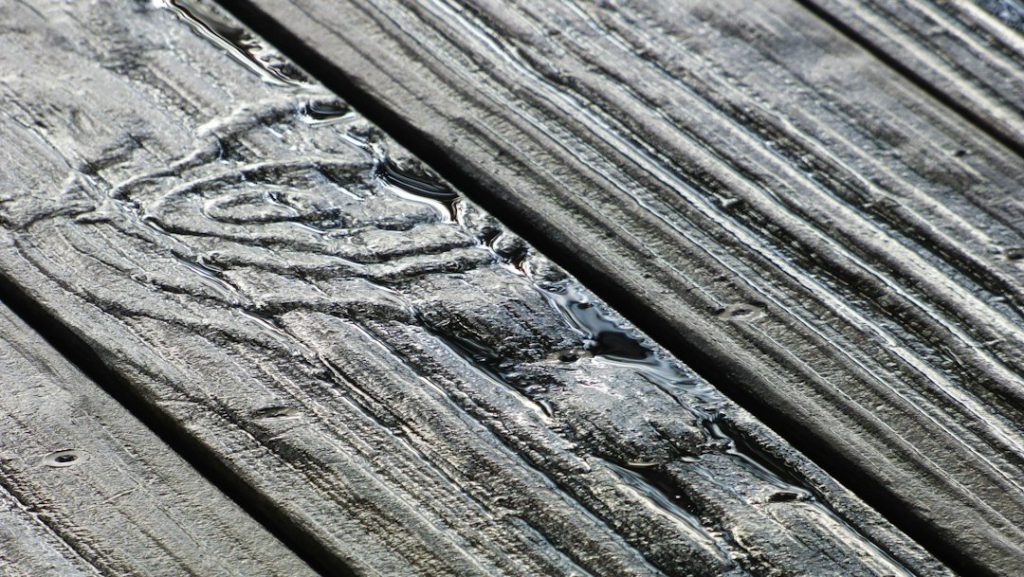
The most obvious sign is the color change. That once rich, warm tone of your deck has likely turned a dull, silvery gray. This isn’t just surface-level. The sun’s UV rays break down the lignin, the natural glue that holds wood fibers together. This degradation is what causes the graying and, if left unchecked, leads to the next issue: fraying. You might see splinters, a fuzzy texture, or even small bits of wood flaking off. This is the wood essentially starting to disintegrate. Then there’s the less attractive, and more problematic, biological growth. Look for patches of green, black, or dark mold and mildew, especially in shaded or damp areas. These aren’t just unsightly; they actively eat away at the wood structure.

Understanding Wood Types and Their Specific Needs
Not all wood is created equal, and your approach needs to reflect that. Softwoods like pine or fir are more porous and susceptible to damage, requiring gentler cleaning methods and potentially more frequent sealing. Hardwoods like oak or ipe are denser and more resilient, but they can still suffer from UV damage and require proper preparation. Exotic hardwoods might have natural oils that react differently with cleaners and sealers. A quick Google search for your specific decking material is a must. For instance, using a harsh chemical cleaner on certain exotic woods could strip away their natural protective oils, leaving them even more vulnerable. A seasoned pro knows this; a novice might learn it the hard way with a ruined deck.
Gathering Your Deck Cleaning and Restoration Supplies
Don’t skimp here. Having the right tools and chemicals makes the job manageable and, frankly, much safer. Running to the store mid-scrub because you’re missing a crucial item is a recipe for frustration and, often, a compromised outcome.
Essential Cleaning Tools and Solutions
You’ll need a robust deck cleaner. Avoid generic household cleaners; they’re often too harsh or simply ineffective on deck grime. Look for cleaners specifically formulated for wood decks. Oxygen bleach-based cleaners are a good starting point as they are effective yet less damaging than chlorine bleach. If you have an old, failing stain or sealer, you might need a dedicated deck stain stripper. For rinsing, a garden hose with a good spray nozzle is usually sufficient. If you opt for a pressure washer, treat it like a loaded weapon – low pressure, a wide fan tip, and constant motion are non-negotiable. Too much power will gouge the wood, creating more problems than you solve.
Safety Gear for Deck Restoration
This is where most DIYers cut corners, and it’s a massive mistake. You’ll be working with chemicals, abrasive materials, and potentially dealing with uneven surfaces. Chemical-resistant gloves are essential to protect your skin from cleaners and strippers. Safety goggles are a must – nobody wants deck gunk or stripper splash in their eyes. Long sleeves and pants protect your skin from both chemical burns and splinters. If you’re sanding, a dust mask is crucial to avoid inhaling wood dust, especially if you’re working with older, treated lumber which may contain hazardous chemicals.

Step-by-Step Guide: Cleaning Your Weathered Wood Deck
This is the heavy lifting. Patience and thoroughness are your best allies here. Rushing through the cleaning phase will sabotage all your hard work on the sealing later.
Preparing the Deck Area: Protecting Surrounding Plants and Structures
Before you apply any cleaner, you need to protect everything that isn’t wood. Use tarps or plastic sheeting to cover nearby plants, shrubs, and any outdoor furniture or sensitive structures. Wetting down the plants thoroughly with plain water beforehand can also create a protective barrier, diluting any cleaner that might drift onto them. Sweep the deck clear of all debris – leaves, dirt, stray twigs, and anything else that could get ground into the wood or interfere with the cleaner.
Applying Deck Cleaner: Choosing the Right Product and Method
If you’re using a powdered cleaner, mix it according to the package directions in a bucket. For liquid concentrates, dilute them as specified. You want a workable solution, not something overly concentrated that could etch the wood. Apply the cleaner evenly across a manageable section of the deck using a garden sprayer or a stiff-bristled brush. Work in sections so the cleaner doesn’t dry out before you have a chance to scrub and rinse it. Avoid using a metal-bristle brush, as this can shed bristles into the wood, creating rust stains later.
Scrubbing and Rinsing: Removing Grime, Mildew, and Old Finishes
This is where the elbow grease comes in. Use your stiff-bristled deck brush to scrub the cleaner into the wood, working with the grain. For heavily soiled areas, you might need to apply more pressure. Let the cleaner dwell for the time recommended by the manufacturer – usually 10-20 minutes. Then, rinse thoroughly with a garden hose. If you’re using a pressure washer, keep the nozzle at least 12-18 inches away from the wood and use a wide fan tip (25-40 degrees). Overlap your passes and keep the wand moving constantly. A dirty rinse is a sign you haven’t rinsed enough. Rinse until the water runs clear and you see no suds or residue.

Dealing with Stubborn Stains and Discoloration
Some stains, like rust spots from metal furniture or dark spots from tannins in the wood, might not come out with a general cleaner. For rust, a specific rust remover or a diluted oxalic acid solution can work wonders. For dark tannin stains, a wood brightener (often oxalic acid-based) is your best bet. Apply these specialty treatments to the affected areas after the initial cleaning and rinse, following the product’s instructions carefully. Remember, patience is key. Sometimes a second application of cleaner or a spot treatment is necessary.
Restoring the Wood’s Appearance: Sanding and Repair
Cleaning removes the surface gunk, but sanding addresses the actual surface of the wood, smoothing out imperfections and preparing it for sealing. Repairs are also crucial here – a beautiful new seal on rotten wood is a waste of time.
Light Sanding for Surface Renewal
Once the deck is completely dry (this can take 24-48 hours after rinsing, depending on humidity and temperature), it’s time to sand. A light sanding with medium-grit sandpaper (around 60-80 grit) will remove any remaining fuzzies, smooth out slightly raised grain from the cleaning process, and open up the wood pores for better sealer penetration. If you have a pole sander or orbital sander, use it for the main deck areas. For edges, stairs, and tight spots, use a hand-held orbital sander or sanding block. Always sand *with* the grain of the wood. Going against the grain will leave visible scratches that the sealer won’t hide.

Addressing Deeper Damage: Replacing Damaged Boards and Fasteners
Now is the time to address any structural issues. Check for boards that are split, rotted, or excessively warped. These need to be replaced. Rotten wood can often be identified by a spongy feel or crumbly texture. If you find loose or popping nails or screws, remove them and replace them with new, corrosion-resistant fasteners (stainless steel or coated deck screws are best). Ensure all fasteners are driven flush or slightly below the surface of the wood. If there are minor cracks or gouges, wood filler or a two-part epoxy wood repair compound can be used to fill them. Allow these fillers to cure completely before proceeding.
Preparing for Sealer: Ensuring a Clean and Dry Surface
This is the final check before sealing. The deck must be bone dry and completely free of dust, dirt, and debris. Any remaining dust will get trapped under the sealer, creating a rough texture and potentially compromising adhesion. A final sweep and, if possible, a quick pass with a leaf blower can help ensure a pristine surface. Any residual moisture in the wood can also prevent the sealer from penetrating correctly, leading to peeling or blistering. Give the wood at least 24 hours, preferably 48, to dry completely after cleaning, especially if you used a lot of water during rinsing.
Choosing and Applying the Right Deck Sealer in 2026
The sealer is your deck’s armor against the elements. Choosing the wrong type or applying it improperly is like sending a knight into battle with a paper shield.
Understanding Different Types of Deck Sealers (Oils, Acrylics, Water-Based)
Oil-Based Sealers: These penetrate deep into the wood, providing a natural look and excellent water repellency. They tend to enhance the wood’s natural color and grain. However, they often require more frequent reapplication and can sometimes contribute to mildew growth if not formulated with mildewcides. They also typically have longer dry times and can be messier to apply.
Acrylic/Water-Based Sealers: These form a protective film on the surface of the wood. They offer good UV protection and come in a wide range of colors and transparencies, from clear to solid stains. They are generally easier to clean up and dry faster than oil-based products. The downside is that the film can sometimes peel or chip if not applied correctly or if the surface wasn’t properly prepared. They might also look less “natural” than oil finishes.
Hybrid Sealers: Many modern products combine aspects of both oil and water-based technologies, aiming for deep penetration with a more durable surface finish. Read the labels carefully to understand their primary characteristics.
Factors to Consider: Durability, Appearance, and Maintenance
Durability: How long do you want the protection to last? Oil-based sealers might need reapplication every year or two, while some higher-quality film-forming acrylics can last 3-5 years. Consider your tolerance for annual maintenance.
Appearance: Do you want to see the natural wood grain, or are you looking for a more opaque, stained look? Clear sealers offer the most natural appearance but the least UV protection. Toners add a hint of color. Semi-transparent stains allow some grain to show through, while solid stains completely cover the wood, similar to paint.
Maintenance: Some sealers require light cleaning and reapplication, while others might necessitate stripping and recoating. Consider the long-term commitment. A product that looks great initially but is a nightmare to maintain is a poor choice.
Application Techniques for Optimal Sealer Penetration and Coverage
Always apply sealer on a cool, dry day with no rain expected for at least 24-48 hours. Avoid direct sunlight, as it can cause the sealer to dry too quickly, leading to lap marks and uneven application. Work in manageable sections, applying the sealer evenly using a quality brush, roller, or pad applicator designed for deck staining. If using oil-based products, back-brushing (using a brush to smooth out the applied product) is crucial to ensure even penetration and to remove excess sealer. For water-based products, avoid over-application, which can lead to a slippery surface or peeling. Always follow the manufacturer’s recommended application methods and dry times between coats, if applicable.
Maintaining Your Restored Wood Deck for Long-Term Beauty
Your work isn’t done once the sealer is dry. Regular maintenance is what keeps your deck looking good and protects your investment.
Regular Cleaning Practices to Prevent Future Weathering
Sweep your deck regularly to remove leaves, dirt, and pollen, which can trap moisture and promote mildew growth. For a deeper clean, use a mild soap and water solution with a soft brush once or twice a year. Rinse thoroughly. Address spills promptly, especially grease or food stains, which can attract pests and become difficult to remove.
Reapplication Schedule for Deck Sealers in 2026
The frequency of reapplication depends heavily on the type of sealer used, the climate, and the amount of foot traffic your deck receives. As a general guideline:
- Oil-based sealers: Every 1-2 years.
- Water-based/Acrylic sealers: Every 2-4 years.
- Solid stains: Can last 3-5 years or more.
The key is to look for signs of wear. If water no longer beads up on the surface, or if you see dull, dry patches, it’s time to reapply. A quick wash and a single coat of sealer are often all that’s needed if the previous coat is still largely intact.
Troubleshooting Common Deck Maintenance Issues
Mildew/Mold: If you spot mildew, clean the affected area with a deck cleaner specifically designed to kill mold and mildew. Ensure good airflow around your deck and trim back overhanging branches to reduce moisture.
Fading: Fading is natural, especially on decks exposed to direct sunlight. Reapplication of a tinted sealer or stain will restore the color.
Peeling/Chipping (primarily with film-forming finishes): This is usually a sign of improper application, inadequate surface preparation, or using a low-quality product. If it’s minor, you might be able to lightly sand the edges and reapply. For widespread peeling, stripping the old finish and starting fresh is often necessary.
Splinters: Ensure you’ve adequately sanded and that your sealer application is even. If splinters continue to appear, it may indicate the wood itself is degrading and might need board replacement.